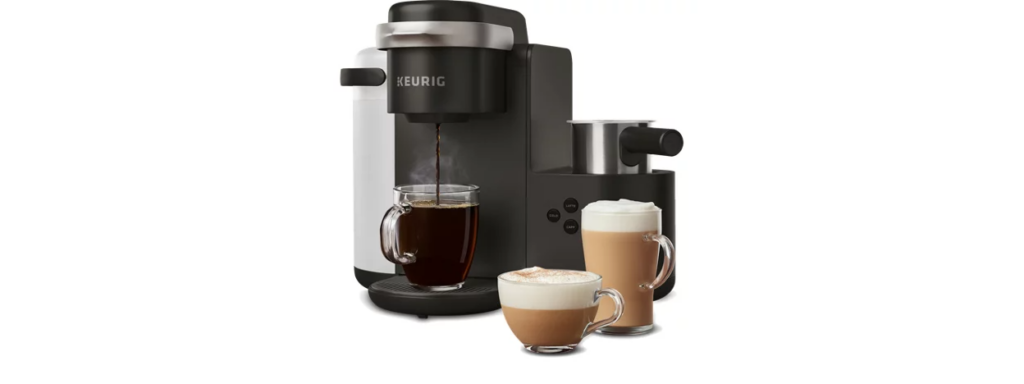
It can be overwhelming to have a new coffee maker, especially if it is something you are buying for the first time. Unlike other single-serve Keurigs, a K-Cafe has other features that let you brew beverages other than regular coffee.
With the addition of a milk frother, a K-Cafe lets you brew cappuccinos and lattes either hot or iced. While it may seem that this feature can make brewing coffee on a Keurig complicated, this is not the case.
Using a Keurig K-Cafe or other Keurig models is very simple. The buttons on a Keurig control panel are very straightforward and you only need to push a couple of buttons to brew a fresh cup.
In this guide, I will cover what you need to know to use a Keurig K-Cafe seamlessly. I will also talk about the features of a K-Cafe and how you can keep it well-maintained so it can last you for years.
In this article:
- Setting Up a Keurig K-Cafe
- How to Make Cappuccino or Latte in a Keurig K-Cafe
- How to Brew Coffee in a Keurig K-Cafe
- Features of a Keurig K-Cafe
Setting Up a Keurig K-Cafe
Before you begin your first brew in a Keurig K-Cafe, you need to set it up first. You also need to perform a cleansing brew on your new K-Cafe first because it might still have some residue and smell left due to its manufacturing process.
The cleansing brew is a one-time setup and you don’t need to do this every time you use your K-Cafe.
Setting up a K-Cafe is very simple as you don’t need to assemble anything. Just take the machine out of the box and plug the cord into an outlet. Remove the frother from the plastic bag and keep it aside as you need to clean it. Make sure to check that a whisk and lid are included with the frother.
To clean a K-Cafe, you will need soapy water, a non-abrasive sponge, a mug, and hot water.
To perform a cleansing brew:
- Clean the frother, whisk, and lid using a non-abrasive sponge and soapy water. Let all the parts air dry or dry them with a clean, non-abrasive cloth.
- Take the water reservoir out of the machine and rinse it and the lid with water. Dry the water reservoir and place it back in the machine. Make sure the lock tab engages and place the lid back.
- Fill the reservoir up to the MAX line.
- Place a mug on the drip tray and plug your machine into an outlet if you have not done so.
- Press the power button. You should see the power light and AUTO OFF light up. This means that the water is starting to heat up. You will need to wait about 3 minutes to heat the water.
- Once the water is heated, lift and lower the handle of the machine. You don’t need to insert any K-cup pod at this point.
- Press the 6 oz. button and the brew button to begin the cleansing brew.
- Once all the water has been dispensed into the mug, pour the water into the sink.
- The cleansing brew is finished and you can now brew your coffee!
How to Make Cappuccino or Latte in a Keurig K-Cafe

The beauty of a K-Cafe is that it not only brews your regular K-cup pods, but you can also make a latte or cappuccino with it. The K-Cafe comes with a frother so you can easily make a cup of latte or cappuccino without the need of another brewing device.
You can make either a hot or iced latte or cappuccino with the K-Cafe.
Equipment and Ingredients Needed
- Mug
- 16 oz. plastic cup if you are making an iced drink
- K-Cup pod
- Milk
To Make a Latte or Cappuccino (Hot or Iced)

- Fill the reservoir with water. Make sure not to overfill it.
- Place the frother and lid on the frother base.
- The frother has a marker inside for Cappuccino and Latte. Fill the frother with your milk of choice on the marker of your choice (LATTE line or CAPP line).
- Place the lid of the frother back and press the LATTE or CAPP button depending on what you want to brew. If you want to make an Iced drink, press the COLD button first before pressing the LATTE or CAPP button.
- The button (LATTE or CAPP) will light up and you will hear a beep once indicating that the milk is being frothed. This will take about 3 minutes.
- After the milk has been frothed, you will hear the beep sound twice and the button will no longer light up.
- Place a mug on the drip tray and place a K-cup pod in the K-cup pod holder. Make sure to not open the foil of the pod. Place a plastic cup if you are making an iced drink.
- If you will be making an iced drink, fill the plastic cup halfway with ice.
- Press the blinking LATTE & CAPP button on the K-Cafe’s control panel and press the brew button to begin the brewing process.
- The buttons on the control panel will stop blinking once the brewing process is complete.
- Pour the frothed milk over your coffee and enjoy!
How to Brew Coffee in a Keurig K-Cafe
Brewing coffee in a K-Cafe is much simpler and doesn’t require pressing a lot of buttons and all you need is a mug, water, and a K-cup pod.
- Fill the reservoir with water and make sure not to overfill it.
- Place a mug on the drip tray.
- Place a K-cup pod into the K-cup pod holder.
- Press the COFFE button. You will have the option to brew 6, 8, 10, and 12 ounces. Press whichever cup size you prefer.
- Wait for the machine to brew your coffee. This will take about a minute.
Features of a Keurig K-Cafe

Aside from having a frother to make cappuccinos and lattes, The Keurig K-Cafe has other features.
Auto Off
2 hours after the last brew, the Keurig K-Cafe will automatically turn off the brewer to save energy. This a great feature if you find yourself busy and accidentally forgot to turn off the machine.
You can disable the auto-off feature if you know that you will be able to turn off the machine right after you use it.
To disable the auto-off feature, turn the power off while the K-Cafe is still plugged. Once off, press the STRONG and the 10 oz. buttons at the same time for about 3 seconds. You will see the auto-off light turn off. Press the power button again to power the machine and the auto-off light should not light up.
To enable the auto-on feature, you can repeat the same process and the auto-off will light up again.
Smart Start
With some coffee makers, you need to wait for the brewer to heat up before you can select your preferred cup size. The K-Cafe lets you select all your options and it will begin the brewing process once you press the brew button.
Strong Brew
The Keurig K-Cafe also has a STRONG button that lets you brew coffee with stronger and bolder flavor profiles.
High Altitude Brewing
You can also set your Keurig to work properly at higher altitudes (5,000 feet). To enable or disable high-altitude brewing:
- Turn the K-Cafe off while it is still plugged in.
- Press and hold the STRONG and 8 oz. buttons at the same time for 3 seconds. These two buttons will blink 3 times indicating that the high-altitude brewing is enabled.
- Repeat steps 1 and 2 if you want to disable the high-altitude brewing.
Shot Button
Aside from the ICED, LATTE, and CAPP buttons, the Keurig K-Cafe also has a SHOT button that lets you brew a shot of coffee. Cleaning and Maintenance
Descaling a Keurig K-Cafe
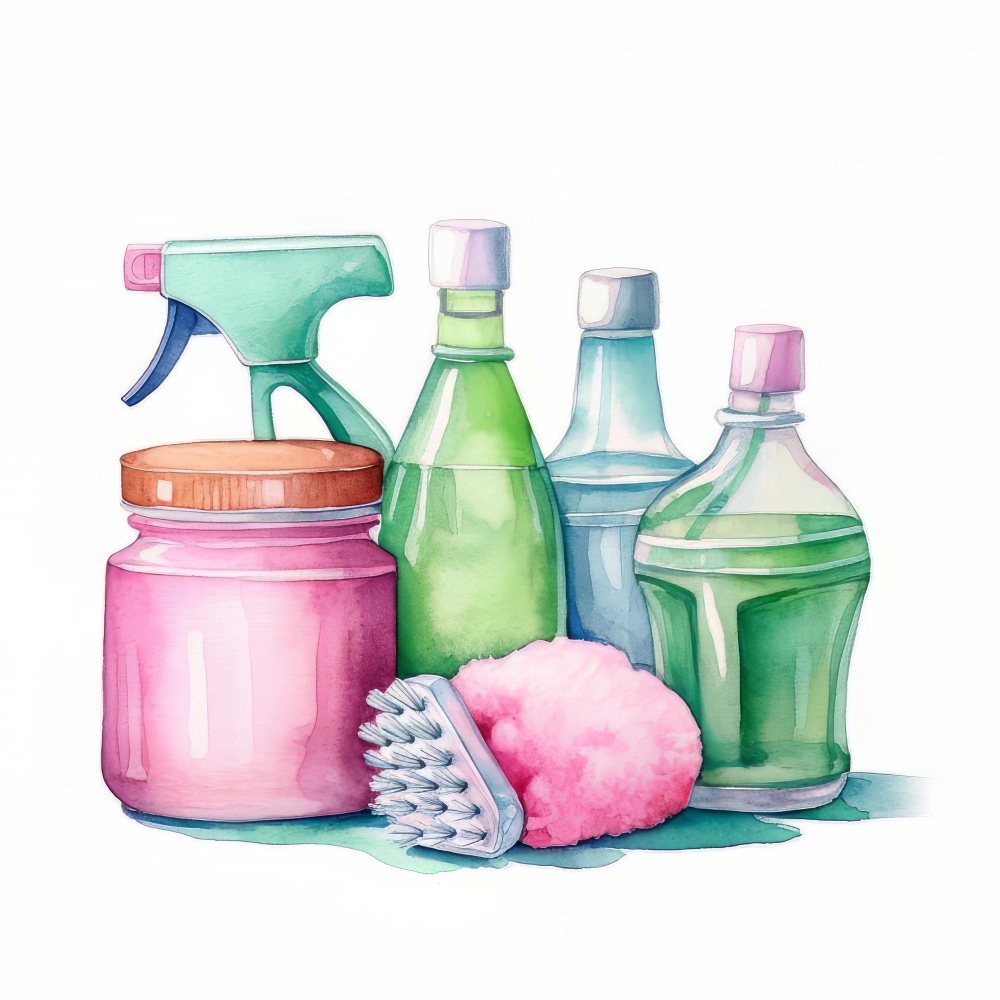
If you drink coffee a lot, you’ll most likely use your Keurig all the time. If you want to keep your K-Cafe clean and well-maintained, it is important to clean and descale it once every 3 to 6 months.
Coffee oils and other mineral deposits build up inside the machine and it can clog your Keurig. Descaling it every 3 to 6 months allows you to deep clean your Keurig and keep it at its best performance.
When descaling a Keurig, make sure that the K-cup pod holder is empty.
Related article: Why Your Keurig Says Descale
Equipment Needed to Descale a K-Cafe
- Descaling solution
- White vinegar (if you don’t have a descaling solution)
- Water
- Mug
To Descale a K-Cafe
- Keep the machine plugged and turn the power button off.
- Pour a bottle of descaling solution into the water reservoir. Fill the bottle of descaling solution with water and pour it into the water reservoir.
- If you don’t have a descaling solution, use equal parts of water and vinegar and pour the mixture into the reservoir.
- Place a mug on the drip tray, lift and lower the K-Cafe handle, and press the brew button.
- Pour the dispensed solution into a sink and place the mug back on the tray.
- Repeat steps 1 to 6 until you see the “ADD WATER” on the control panel light up.
- Once the “ADD WATER” illuminates, let the brewer stand for 30 minutes while it is still on.
- Discard the water after 30 minutes.
- Pour fresh water into the reservoir up to the MAX line and place a mug on the drip tray
- Run a water-only brew cycle at least 12 times using the largest cup size. Fill the water reservoir again if needed.
Related article: Keurig Descale Light Won’t Turn Off After Descaling – Quick Fix
Final Thoughts
If you are looking for convenience and variety in a coffee maker, the Keurig K-Cafe fits the bill. It is easy to use, convenient and gives you options to brew cappuccinos and lattes.
Pressing a couple of buttons will let you have your fresh cup of coffee ready in no time!